How to add Hotjar to my WordPress website? There are several methods to do this. Let’s discuss two of them, via plugin or hard-coded. I would normally add Hotjar to a website using Google Tag Manager, but there is a way much easier for WordPress! I’ve also added another option on how to get the tracking code in case you might want to add it hard-coded – but this is more advanced and there are multiple ways to add the tracking code to the website manually.
You can use a WordPress plugin or add the tracking code to your website (don’t do both, just choose one because otherwise, it will not work properly).
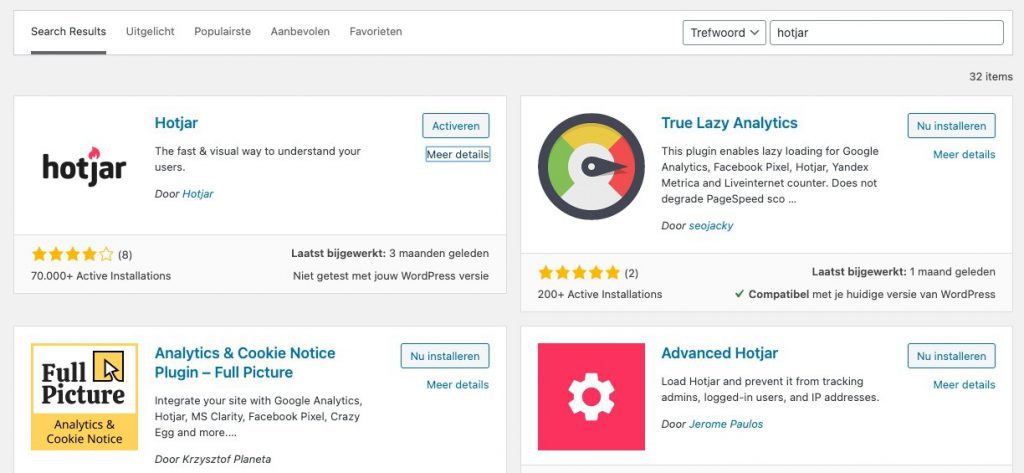
The easiest way to get started with Hotjar is to install the official WordPress plugin of Hotjar. Below is a complete step-by-step guide:
After logging into your WordPress website, go to plugins and then click Add New plugin. Search for the Hotjar plugin, or download the plugin from the link shared earlier and install it. Don’t forget to activate the plugin.
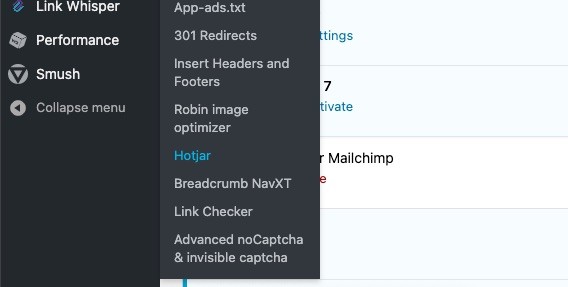
Now go to settings > Hotjar in the WordPress menu.
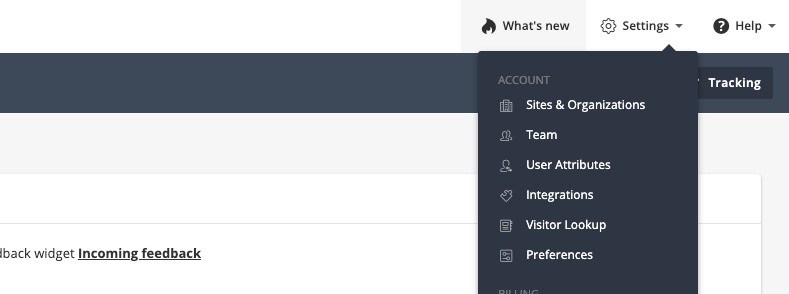
Open a new tab and log in at https://insights.hotjar.com/login
In Hotjar, go to the top right of the screen Settings > Sites & Organizations
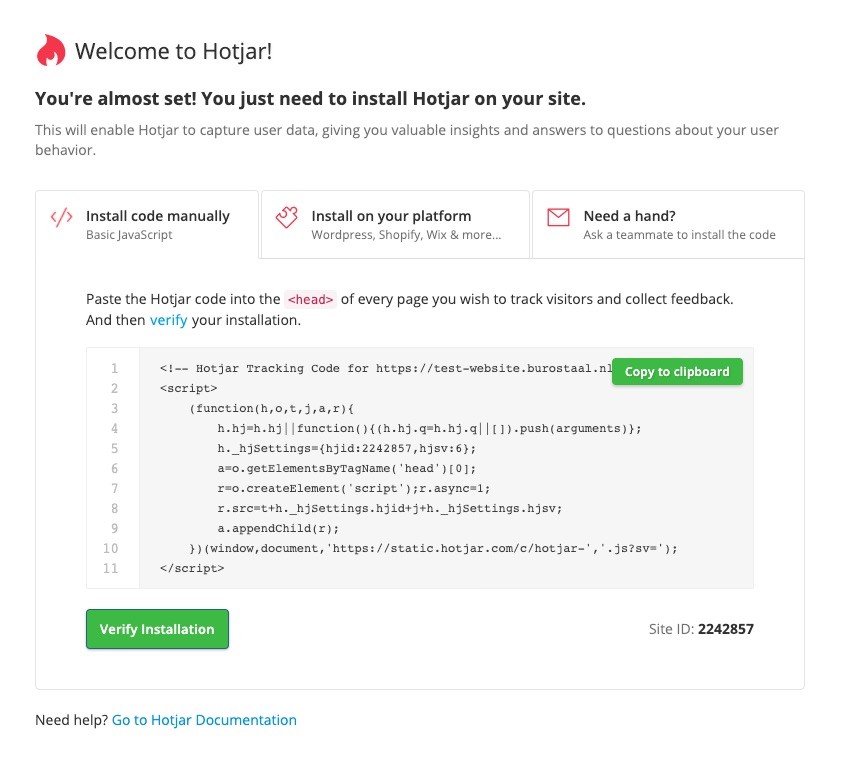
Find the domain on which you want to set up Hotjar and copy the unique 7-digit code that is listed with it.
Now add the unique 7-digit code to the Hotjar plugin on WordPress and save it.
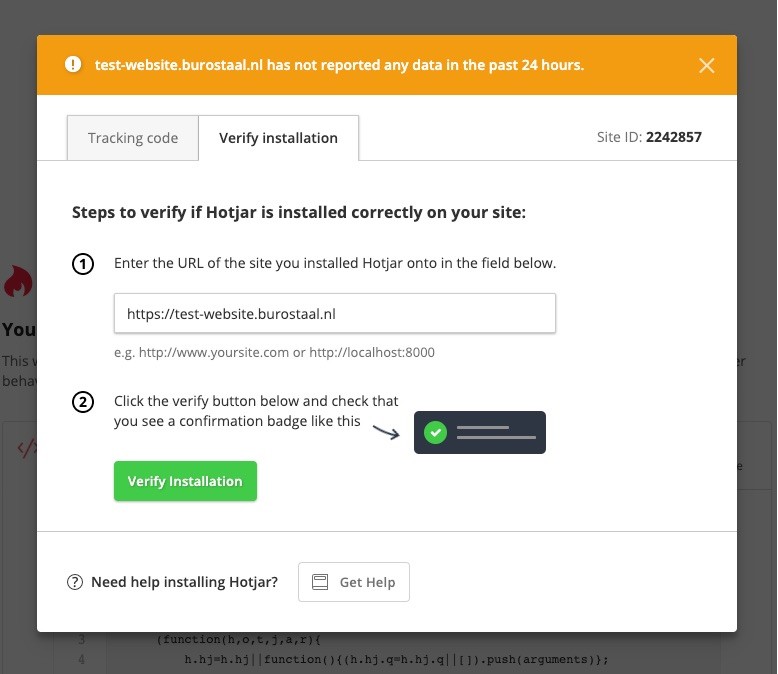
Check via Hotjar that the code is working. Go back to the page where you got the unique 7-digit code (otherwise, follow the first 3 steps again). Now click on the gray button called Tracking Code.
A pop-up will now appear. In the first field, add the URL of your website. Click on the green button Verify Installation. You should get a message that everything is working!
P.S: you can also get a new page with a piece of code, then click Verify Installation and you will get the step above.
Do you have knowledge of code, or can you easily outsource this job to a developer? Then you can consider loading the Hotjar tracking code directly Hotjar into the website. That gives the greatest chance of Hotjar loading successfully. At the same time, this also makes it extra difficult to put the code behind a cookie that goes through Google Tag Manager. In order to comply with the GDPR law. Below I explain where you can find the code for Hotjar if you would like to know how to make Hotjar GDPR proof, so you won’t have to put it behind a cookie wall – check out this article I wrote: Free Hotjar GDPR Compliant Settings.
Login via https://insights.hotjar.com/login
In Hotjar, go to Settings > Sites & Organizations in the top right of the screen.
Find the domain whose tracking code you want to install. Then click on the gray Tracking Code button. You will now see a pop-up.
You may find that in the pop-up you are in the Verify installation tab. To the left of Verify installation, you will see a tab called Tracking Code. Open the Tracking Code tab. Next, you will see a code, copy it, and put it on your website. Give it a try! It also says where this code should be installed on the website (in the head).
From the moment Hotjar is on your website, you can use Hotjar to check if the code is installed properly. Follow the first 4 steps again, only at step 4, you will stay in the Verify installation tab. Enter the URL of your website and click on the green button to Verify Installation. A new window will open with the message Hotjar installation verified (if this is not the case, this will also be indicated).
Hotjar can be very useful to analyze your website. Save time and money right away! Try and analyze what is wrong with your website, fix it, and conversions will hopefully increase. If you don’t have any traffic, it will be hard to analyze your website. In that case, it might be more interesting to look into SEO to get traffic to your website!
Hopefully, this was easy for you, if you can’t figure it out hit me up on any of my socials or by mail.
CRO specialist based in Groningen. I help companies increase revenue by optimizing their conversion funnel.
Schedule call