The timestamp is something you can send with every single hit you send to Google Analytics (GA). You can use a timestamp to define at what time your users trigger certain hits/events on your website. For example, if you would like to know (in detail) when your visitors have bought something, you can use the timestamp.
You can decide for yourself when you would like to send the timestamp hit. This can be on every page view or just on transactions. That’s completely up to you. In the article, I will use Google Tag Manager (GTM) to implement the timestamp. We will of course combine GTM with GA since we need GA to read all the data, but also to create a custom dimension, so we can filter on timestamp.
I assume you have already created a GTM account, implemented it, and have a little knowledge about this tool.
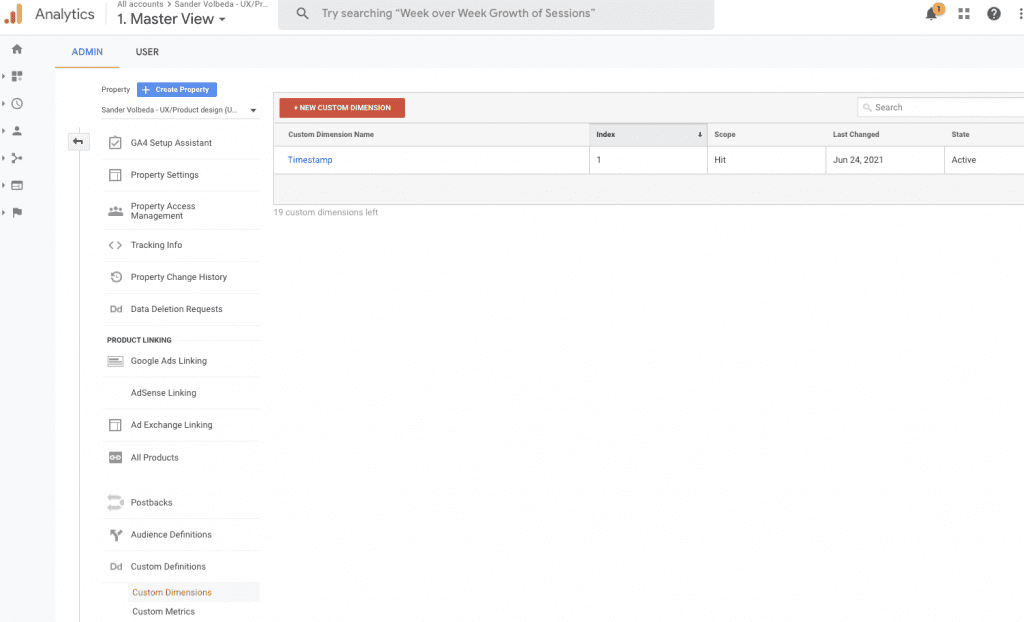
The first step you’ve got to take is to create a custom dimension in Google Analytics.
You’ll now get some code back after the 6th step, but that’s only if you add the functionality hardcoded within the tracking code. We’re not going to do that, we will use Google Tag Manager for that.
This is what you’ll have when you’re finished with this step:
Let’s dive into Google Tag Manager (GTM) now.
We will need to add some JavaScript (JS) to Google Tag Manager in order to find out the time of our users.
function() {
    // Get local time as ISO string with offset at the end
    var now = new Date();
    var tzo = -now.getTimezoneOffset();
    var dif = tzo >= 0 ? '+' : '-';
    var pad = function(num) {
        var norm = Math.abs(Math.floor(num));
        return (norm < 10 ? '0' : '') + norm;
    };

    return now.getFullYear()
        + '-' + pad(now.getMonth()+1)
        + '-' + pad(now.getDate())
        + 'T' + pad(now.getHours())
        + ':' + pad(now.getMinutes())
        + ':' + pad(now.getSeconds())
        + '.' + pad(now.getMilliseconds())
        + dif + pad(tzo / 60)
        + ':' + pad(tzo % 60);
}
Save it. It will look like this:
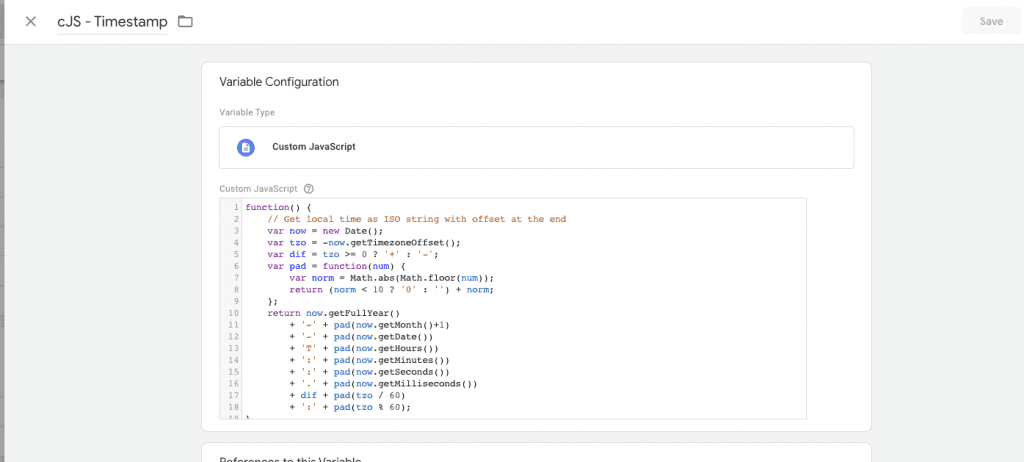
The Timestamp you’ll get with this code above here is l2021-06-23T15:14:46.528+02:00
The timezone can be used to define at what time in the certain timezone somebody did something. This makes it easier to understand when visitors are for example buying something. Is this in the evenings, for example? Without the timezone added, you wouldn’t know this for sure (if your website is international).
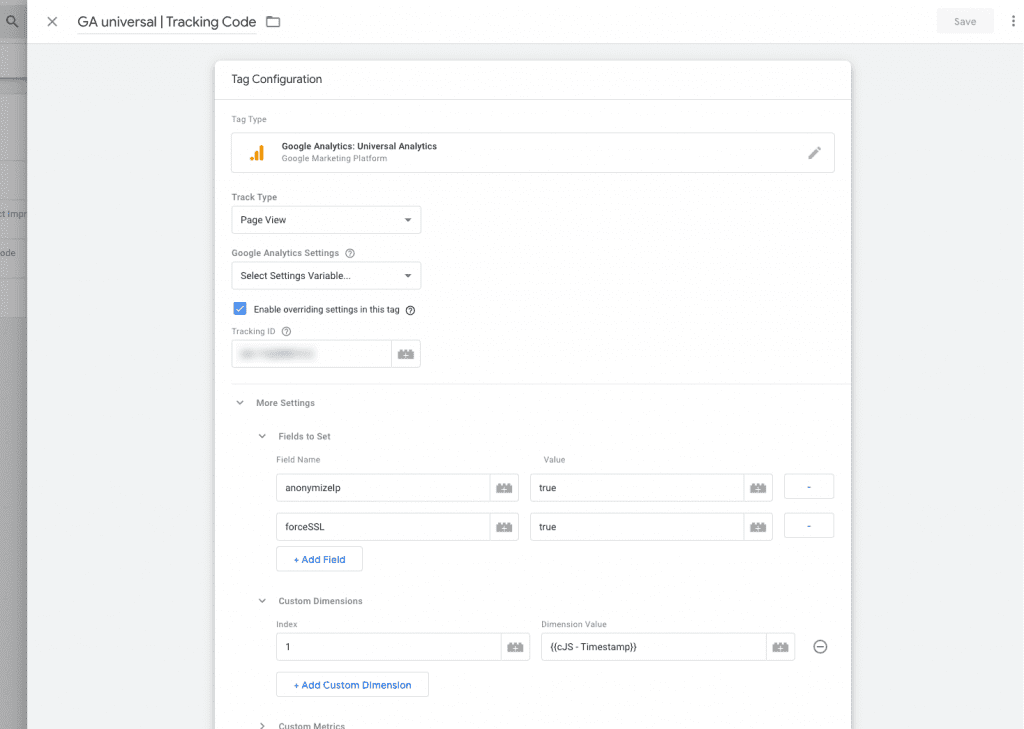
If you’re like me, you’ll like to have everything structured within Google Tag Manager. There’s a good chance you have all the Google Analytics settings within a variable. Normally you would add the custom dimension to the GA variable, but you can’t do that with Custom Dimension, it doesn’t work.
You’ll have to manually overwrite your Google Analytics tag, and I will show you how.
It will look like this:
Don’t publish yet. We need to test if it’s working.
You should test before you put anything live! Just to be sure.
Done! Make good use of it.
This is what it looks like when checking the variable (I named my Timestamp cJS – Timestamp):
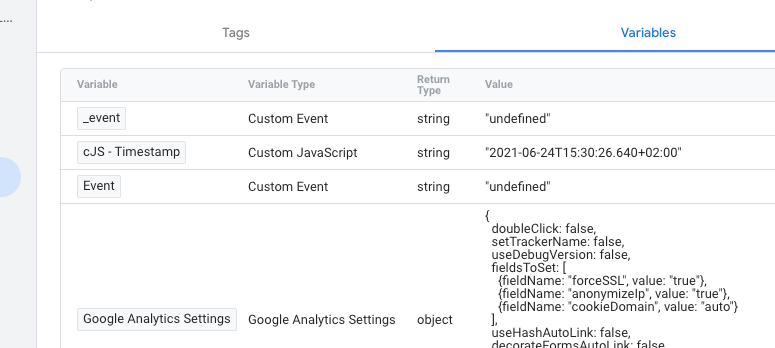
Everything is timestamped now. You can now use it as a custom dimension in Google Analytics. Like everything in Google Analytics, it doesn’t work backward, so only things that happen from now on will get timestamped.
If this text version didn’t work for you, and you need more details. Check this video on YouTube (it might be outdated, but the idea/steps are mostly the same).
Feel free to reach out to me if you can’t get it to work. Since you’re here, you might also be interested in Outbound link tracking and Scroll Depth tracking using Google Tag Manager. More data to collect!
Other interesting sources:
CRO specialist based in Groningen. I help companies increase revenue by optimizing their conversion funnel.
Schedule call